Pages

Showing posts with label 10SCI. Show all posts

Wednesday, 20 November 2019

Extracting DNA *cough cough Organs* Genetics 🔬 🧪🧬

I lied, we didn't extract any organs, cause I'm pretty sure that's illegal, and I don't think I need anything on my permanent record. 
K, so Mr Heath is going to extract all our DNA and all our organs and sell them on the Black Market. Just kidding guys, I do Brazillian Jiujitsu now so I can kick his butt and he's too scared to mess with me anyways. Notice how I say the word butt but I really mean a**. 

ANYWAYS, For our Genetics topic in Science, we conducted an experiment, extracting DNA from a Kiwifruit. Turns out you need quite a lot of equipment, so keep that in mind if you are planning to conduct this experiment yourself. You also need Ethanol, now I'm not sure if you can purchase it anywhere, so be mindful of that if you wish to conduct this experiment. Ethanol is stronger than stomach acid, let that sink in for a minute. 

Just thought I would give you a brief lesson on extraction. Nowadays, when people hear the word "extraction", a lot of them think of pimple or earwax extractions, and maybe even organ extractions. In a scientifical context, extraction is a way of separating a substance desired when it is mixed with other substances. So in normal words, it's taking out a substance that has been mixed with other things. So in this case, we were extracting DNA from a Kiwifruit so we were taking out the DNA from it, or separating it.

Equipment for the extraction 
Kiwifruit (don't eat it)
Scalpel (this is sharp, please don't cut yourself cause I'm not being responsible for you cutting yourself, I don't want to be sued)
Scientific spatula (not the type you cook with, wouldn't want to die because of the chemicals in the laboratory)
Ziploc Bag (like the bag you used to put all your snacks in during primary school, you could still do it now, I don't know your life)
25mls of water (have you drunk enough water today?)
A pinch of salt (if you want to be all food scientific, a pinch of salt can be measured at the end of a knife)
Small cloth to wipe all your tears away (just kidding I'm sorry)
Funnel (the triangle looking thingy)
Beaker (This is the piece of equipment that looks like a cup)
Test tube (where the extraction occurs)
A squirt of Dishwashing liquid (I don't know what measurement a "squirt" is equivalent to, but just a tiny bit)
10mls of Ethanol (Don't drink the Ethanol you idiot, you don't want to die of poisoning)

Method of the extraction (read carefully) 
1. CAREFULLY using the scalpel, slice the kiwifruit in half. Be careful not to cut your fingers off, cause you need fingers, and you don't want to lose your precious phalanges (look at me using the scientific term for finger bones, you should be proud)
2. CAREFULLY using the spatula, scoop out the goopy remains and insides or flesh of the kiwifruit and place it in the Ziploc bag. (NO YOU CANNOT EAT THE KIWIFRUIT, IT IS IN A LAB. LAB=CHEMICALS, CHEMICALS=POTENTIAL HARM TO HEALTH, HARM TO HEALTH=SICKNESS, SICKNESS=POSSIBLE DEATH, soz that's a bit dramatic but you can't be too careful.)
3. Add 25mls of water and the pinch of salt to the ziplock bag
4. Close the bag and use all your anger to mush the kiwifruit into a soup-like paste. Channel your inner boxer to mush the heck out of that kiwifruit.
5. Place the cloth on top of the funnel and the funnel over the beaker. Pour the soupy kiwifruit mixture liquid into the funnel/cloth. (DON'T EAT IT)
6. Pour the liquid from the beaker into a test tube
7. Add your squirt of dishwashing liquid to the liquid and swirl it around in the test tube.
8. Allow to sit for 5 minutes
9. Tilt the test tube on a 45-degree angle and slowly pour the 10ml of Ethanol into the mixture. (DON'T DRINK IT)
10. Allow the mixture to sit.

Results of our experiment
So I do believe that our experiment was successful. After we completed all of the steps and allowed it to settle for a few minutes, the mixture had white strands that rose to the top, which was the DNA. The mixture separated into three sections, the top section looked quite cloudy and it formed together quite nicely. The middle layer separated the foam and was clearish and looked like water and the final layer at the bottom looked like kiwifruit juice and was green (just like Kermit the frog). You may not be able to really see it in the photo and it's quite hard to see, so you're just going to have to trust me that, these were the results.  The vertical photo was after the dishwashing liquid step. The photo beneath this text was after all of the steps.


Discussion

Yay, now you get to read me rambling on about extraction, wooo, lucky you.
So the steps we took allowed us to separate the DNA from the rest of the contents in the Kiwifruit, so in the end, we got to see all the DNA in half a kiwifruit which was cool. In the end, Mr Heath did give us permission to play with the remaining DNA in the test tube, so we picked it up and felt the texture which was quite jelly-like. The water that we added aided in the breaking of the kiwifruit and but didn't really provide many other uses. The salt was used to aid in the clumping process of the DNA and you can see that in the white foam at the top of the mixture. Salt is used in many different chemistry experiments in this way. The foaming detergent made the DNA more prominent than just the white foam and we could actually see at least some of the DNA strands, and they stood out so much due to this detergent. As the detergent is bubbly and easy to study, it really did help this experiment. The ethanol was what provided the strands of DNA and the foam to rise to the top. Ethanol has a different density to the water, which is what caused it to rise to the top, and brought the kiwifruit DNA strands with it.

Conclusion
So what have we learned reading this post? Well obviously, DON'T EAT FOOD IN THE LAB, seriously, it can be very dangerous and we don't want any harm to anyone. Fun fact, Ethanol is stronger than stomach acid so it could cause death, be very careful. I am very glad that we were able to extract all of the DNA from half of a Kiwifruit, our experiment was very successful. I honestly, before this, didn't know the full scientific definition of what extraction was so that was good to learn. We have learned that with the extraction of DNA, the process is quite simple and that we can separate DNA from other contents within fruits and other things. I do think that this was quite interesting. I still think I prefer Chemistry over Biology, but it's starting to grow on me and I've enjoyed this topic.


Wednesday, 13 November 2019

Explosion thingies, AKA Volcanoes

How do Volcanoes form?
Volcanoes occur because of the movement of the tectonic plates. The movement of a plate sinking beneath another plate into the mantle makes it become very hot and it then melts due to the friction. This is called Magma, and as it rises through the cracks of the earth surface, causing pressure buildup and it eventually is released. Once this pressure is released, the magma flows to the surface causing what is known to be called a volcanic eruption. Once the magma has reached the surface, it erupts to form lava flows and ash deposits, once that has cooled, it forms a new crust. After years and years of buildup of this lava creates the Volcano shape that most people are familiar with. 

The Diamond Head Volcano in Hawaii

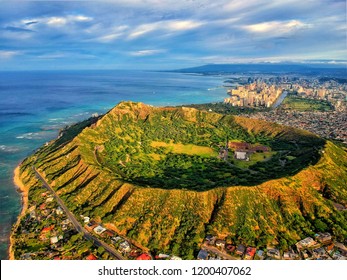
Image result for diamond headThe Diamond Head Volcano is a volcanic tuff cone on the Hawaiian island of O'ahu and is known to most Hawaiians as Le'ahi. This volcano is widely known for its beautiful views of O'ahu as well as the humungous crater at the top. Lying at the southern edge of Waikiki, Le'ahi is an extinct volcanic crater and tuff cone. It was the site of a Luakini Heiau, which is a historical structure dedicated to the war god and was used for human sacrifice as well as devotion to the god. The name Le'ahi was originally given to the volcano by the Ancient Hawaiians. It is most likely that lae "brow ridge, promontory" and ahi "tuna" because the shape of the ridgeline of the crater as seen from Waikiki resembles the shape of a tuna's dorsal fin. But it can also mean "wreath of fire" and refer to the navigational fires lit on the summit to assist canoes travelling offshore. It was known as the Diamond Head in 1825 when the British sailors and settlers mistook volcanic crystals for diamonds. The volcano is estimated to be 150,000 years old and extinct for 150,000 years. The Diamond Head crater was formed from many cones and vents. It is responsible for a series of volcanic eruptions called Honolulu Volcanic Series. The eruptions caused several popular landmarks in Hawaii to emerge. The eruption that created the Diamond Head lasted for only a few days. 

Many people visit the Diamond Head Crater every year. It is quite a famous tourist attraction. Visitors to Waikiki often hike to the Diamond Head Monument. It takes around 2 hours to reach the observation deck, but if you are quite an efficient, fast walker, it could take less than an hour. There are many stairs on the way up to the monument and a small tunnel that you have to pass through. Once you reach the observation deck, you will be able to observe the scenery of Waikiki. 

Hawaiian legends say that the volcanic cone was one of the places where Pele, the volcano goddess, and her younger sister, Hiiaka, lived as they searched Hawaii for a permanent home. 


Our Volcanic Eruption 


After researching volcanoes, we were given the task to create a model of one of our group members volcanoes. Jessica's volcano was the volcano we used. Mount Vesuvius. Using paper mache, we created the volcanic structure of the volcano and then painted it. We erupted the volcano and it went quite well.

4 spatulas of Potassium Iodide in 20mls of water 

 20mls of 35% hydrogen Peroxide 
Dishwashing liquid 
Red Food colouring 
H202--------> H20 + O2

First, we mixed the Potassium Iodide and the water together in the small beaker until it was clear like regular water, While Jess was doing this, Molly and I mixed the rest of the ingredients into our volcano. To create the final lava flow, we added the iodide mixture into the bottle and watched how it erupted. This experiment worked because Hydrogen Peroxide is water and oxygen and slowly separates. The Potassium iodide was asses to the hydrogen peroxide to speed up the eruption process. The glitter we added also made it super sparkly and I love it.


Wednesday, 11 September 2019

Flamin' Heath Land Yacht


Aim
To build the fastest Wind racer out of the materials we were supplied.

Equipment 
Trolley (Cart chassis)
Cardboard
1 meter of paper roll
Scissors
2 meters of sellotape
Metal rod

Method 

1) Put the Metal rod into the trolley
2) Tape the strips of cardboard onto the base of the Metal rod so the base of the sail is formed.
3) Cut out a large triangle of paper and wrap it around the Metal Rod to form sails
4) Secure the sails onto the chassis with tape and tape any extra flappy bits down.
5) Make sure it is all secure and stable
6) Use the leaf blower to see how far it travels and the speed it travels.

Research 
https://www.instructables.com/id/Protei-Land-Yacht/

We took information from this website to figure out what shape our sails would be. We thought that the triangle shape would catch more wind and therefore go further than it would have compared to another shape. The triangle shape was quite a good choice and our design looked nice on that shape. We also want wheels on our chassis to be quite smooth but also have enough friction to stop it from completely falling over. We decided to put bits of cardboard near the base of the chassis just to ensure that it is still secure so it doesn't fall over and so the sails don't flap around.

Pictures 

Here we have some incredible photos of our land yacht. Molly painted Mr Heath on our land yacht.  Our yacht is called Flamin' Heath

Results 
The Velocity of our Land Yacht was 1.18MS-1
(at the time of updating my blog post, I forgot what the measurements were but I will update them when I find out)

To figure out what the Velocity of a moving object is, you need to divide the distance measured by the time measured.
Formula
V=⧍d/⧍t
The triangle means delta, delta means change. So the change of distance, divided by the change of time.

Discussion 
The initial launching of our land Yacht wasn't too bad and it did go 6.4M which was further than we thought it would be. I think if we used our cardboard more effectively by using more of it in more places nearer the base, we would have gone a bit further. I do think that for what we did, we got a good result. Molly and I worked well together and Molly did an excellent job with the designs of our sails. The science department seemed to appreciate the great feats of artistry. If we don't win most creative then I don't know what will.  I think that we did manage to make quite a nice land yacht. It didn't get very far but it went pretty far for what we had. During the race, if I had angeled the leafblower from a lower angle and happened to point it a bit higher up then it would have worked out a bit differently than it did today.


Conclusion 
In conclusion, the launching of our land yacht wasn't too bad and it went further than we expected. There are a few things that we would have changed such as the amount of cardboard and tape we used, but we are still very happy with the end result.

When measuring Velocity, be sure to use the correct formula.

Saturday, 17 August 2019

I love this experiment watts and watts! Sorry I'll stop now


Aim:
To light up a lightbulb using saltwater. 

Equipment:
Lightbulb
Beaker or shallow container
Wires 
Salt + Water 
Iron Nails 
Battery Pack 
Spatula 

Method:
1. Fill a beaker will 100ml of water 
2. Add 60Mls of Salt into the water 
3. Connect the lightbulb to the battery pack
4. Clip 1 Iron nail to another wire that is clipped to the lightbulb 
5. Clip another Iron nail to another wire that is connected to the battery pack
To the right, I have put photo evidence of what the experiment should look like. 

Results:
Our experiment was very successful! We managed to light the lightbulb and even create some Chlorine water, which was a slimy kind of green. 

Discussion: 
Pure water isn't very conductive, only a small bit of current can move throughout the water. When Salt or Sodium Chloride is dissolved in the water, the salt molecules are split into two pieces; a Sodium Ion and a Chlorine ion. The Sodium-ion being positive and the Chloride ion being negative. The electrons can flow through these ions meaning that the saltwater completed our circuit. 

By adding more and more salt, we increased how intense the brightness of the lightbulb was. This is because we increased the number of electrons that are flowing through the ions. 

What is electricity?
Electricity is a type of energy that is fueled by the transfer of electrons from positive and negative points within a conductor. It is the presence and flow of electrical charge, and we use electricity to power machines and various electrical machines. 

What is an electrical circuit? 
An electrical circuit is a path where electrons from a voltage or current flow. The path may be closed, making it a loop, these closed circuits make electrical current flow possible. When drawing electrical circuit diagrams, there are a set of rules that you need to follow. You need to use a ruler when drawing lines and angles, each corner needs to be at a 90-degree angle, each component cannot be on any corners, and avoid realistic sketches. 

Conclusion:
In conclusion, our experiment was a success! It worked and the electrical circuit was completed. The ions in Sodium Chloride allowed the electrons to flow through them and completed the circuit. We created Chlorine water that turned green. 

Wednesday, 10 July 2019

Corrosion- Investigating rusting

Aim:
To investigate the factors that cause rusting in iron.

Equipment:
Six test tubes
Test tube rack
Bung
Six iron nails
Boiled water
Tap water
Salty water
Cooking oil
Calcium Chloride


Method:
1. Label four test tubes A-D and place in a test tube rack.
2. A= Iron nail and tap water
    B= Iron nail with salty water
    C= Iron nails, boiled water, oil
    D = Iron nail and calcium chloride, sealed with a bung
    E= Nail polish + water
    F= Mg wrapped around the nail + water
3. Leave the test tubes undisturbed for three days.

Results:  
Discussion:
When Metals are exposed to the environment, they can deteriorate, or break down. This is called corrosion. Rust is used to describe the corrosion of Iron. Rusting of Iron requires water and Oxygen, if either of these elements is removed, corrosion will not occur. The process of rusting will be much quicker if Salt is present. The easiest way to prevent rusting is by preventing the iron from being exposed to Oxygen or water. By coating/painting the iron nail in paint or grease, a barrier is created, preventing the environment corroding the Iron. Corrosion can also be prevented by coating the Iron in another more reactive metal such as Zinc or Magnesium. Our class used Magnesium. 

Nail results
A- Iron nail and tap water
-  This nail came out rusty. As there is nothing preventing the exposure to water, the nail is going to get to the nail and cause corrosion.  

B- Iron nail and salty water
- This nail was slightly rusty. As Iron corrodes in the presence of Oxygen and water, the nail is rusting as the water contains dissolved Oxygen. It is also rusting faster than it would if there was no salt in the water. 

C- Iron nail, boiled water and Oil. 
- This nail had no rust. The oil in the test tube creates a barrier between the nail and Oxygen. As there is no exposure to the Oxygen, there is nothing for the water to react to, so corrosion will not occur. 

D- Iron nail, Calcium Chloride, sealed with a bung. 
- This nail had no rust. The Calcium chloride dried out the air and the bung prevented any other oxygen from entering the test tube. 

E - Iron nail, Nail polish and water. 
- This nail had slight rust. Mr Heath explained that this was probably because we did not paint thick enough of a layer of Nail polish onto the nail. The nail polish should have created a barrier between the nail and the water, but as we did not paint a thick enough layer, it rusted. 

F- Mg wrapped around the nail and water. 
- There was no rusting on the nail itself, but the Magnesium itself had corroded. Zinc is also used to prevent corrosion in Iron nails. When an Iron nail is coated in Zinc, it is called a Galvanised nail. The Zinc layer stops the Oxygen/Water from attacking the Iron. While Zinc is more reactive than iron, it offers physical protection but also provides chemical protection. 

Conclusion:
Rusting of Iron requires Oxygen and water. For example, when Iron is exposed to moist air, it reacts with Oxygen to create rust. Many of these methods used in this experiment prevented the rust very slightly. If you are looking for nails that do not corrode, I recommend Galvanised nails. 

Testing for Carbon Dioxide Gas

Aim:
To show that Carbon Dioxide gas is produced when a metal carbonate reacts with acids. 

Method:


  1.  Add a pea-sized amount of the metal carbonate into one of the boiling tubes.
  2.  Place this boiling tube into a test tube rack. Ensure you have the bung and delivery tube ready. 
  3.  Add 5ml of acid to the boiling tube and quickly insert the bung and delivery tube into the mouth of the boiling tube.
  4. Holding the other boiling tube with your tongs, capture the gas produced. 
  5. When you think that the tube is full, light a wooden splint. 
  6. Carefully remove the boiling tube from under the delivery tube, taking care to keep it facing upward. 
  7. Insert the burning splint into the mouth of the test tube. 


Results/Observations TEST 1. 

Once the enflamed splint went into the flame. The orange flame went out immediately. 

Result/ Observations TEST 2. 

During the second version of the experiment, the limewater went cloudy. 

Discussion 

During this experiment, we observed a chemical reaction. This reaction was between the Metal Carbonate (Calcium Carbonate) and the acid (Hydrochloric acid). During test 1, the flame chocked and went out due to having no Oxygen within the space. When doing the experiment many gas bubbles were formed in the test tube, and when we put the lit splint in, the flame went out. 

 Regarding test 2 with the Limewater, the result was the Limewater going cloudy. The Limewater goes cloudy because it reacts with Carbon Dioxide to form Calcium carbonate which is insoluble in water resulting in making the Limewater cloudy. 


Image result for testing for carbon dioxide gas explanation limewater


Conclusion
During these experiments, we watched a chemical reaction occur. Metal Carbonate (Calcium Carbonate) reacted with Hydrochloric acid. 

Calcium Carbonate + Hydrochloric acid ----> Calcium Chloride + Carbon Dioxide + water.
As the gas went through the delivery tube, the receiving tube filled with gas and if it went longer it would have left a carbon dioxide and calcium chloride in the first boiling tube. 

Tuesday, 11 June 2019

Model Atoms


Aim: To make a model Atom.

Equipment:
- Tape
- Beads
- Blue Tack
- String
- Paper

Method
- The first step when making a model atom is to figure out the number of electrons that the atom contains. The element that I chose to do was Boron. There are 5 total Electrons in total so I had to draw 5 circles in the shells.
- The second step was to create and cut out the shells for the model atom. I needed to cut out two shells so I drew out two shell shapes and then proceded to cut them out for the model. You don't need to make them exactly perfect but it is nice to have them even.
- The third step was to draw the electrons on the shells. I needed to draw 5 so on the smaller shell in the middle, I drew a group of two circles. Then on the next shell, the larger one, I proceeded to draw one singular circle and then I drew a group of two circles next to another.
- The fourth step in making a model atom is to create a nucleus, in the centre, you can see the nucleus has beads representing the Protons and Neutrons that your element has. My element had 6 Protons and Neutrons all together so I used three white beads to represent Protons and then green beads to represent Neutrons. I used three of each bead. After that, I just cut some string and stuck it all together.
- Finally, I created an element sign and made it look presentable.

Discussion 
So what are these Protons and Neutrons and all this smart sounding stuff? So Neutrons, Protons, Electrons, Nucleus' all make up atoms. What do atoms do? ATOMS MAKE UP EVERYTHING!!! It took our class a long time to understand this, but Atoms make up every single thing on this lonely universe. Every single plant, every single person and every single potato on this earth. Everything on this earth is made up of atoms. But what makes up an Atom?

Protons and Neutrons 
Protons and Neutrons are in the centre (Nucleus) of the Atom. Protons are positively charged particles found within an atomic nucleus. The number of protons in an atom defines what element it is. The number of protons is the atomic number in that Atom. Neutrons are uncharged particles found within an atomic nucleus.

Electrons
Electrons are the primary source of electricity in solids. They are particles with a negative charge of Electricity and are found in all Atoms. These Electrons orbit around the atomic nucleus.

Sunday, 2 June 2019

Neutralisation experiment


In science, we have been learning about Acids and Bases. Chemical reactions occur when you mix together an Acid and a Base together. The base cancels out the effects of the Acid. This reaction is called Neutralisation because a neutral solution is made if you add just the right amount of Acid and Bases together. Chloe, Jess, Molly and I did an experiment exploring Neutralisation.

Neutralizing Acids and Bases

Aim:
To observe a neutralisation reaction by neutralising Sodium Carbonate using Hydrochloric Acid.

Equipment:
- Test tubes,
- Test tube racks,
- Sodium Carbonate,
- Hydrochloric Acid,
- Pipette,
- Universal indicator solution'

Method:
1. Add approximately 1-2mL of Sodium Carbonate into a test tube and place the test tube into the test tube rack. Add 3-5 drops of Universal Indicator solution.

2. Using a pipette, add Hydrochloric Acid drop by drop. Be careful because adding even a small amount of extra acid can mean you miss the neutralisation part.

Results: 
Here you can see that Chloe, Jess, Molly and I have created a rainbow using the Acids and Bases. The Red, Orange and Yellow liquids are all acidic. The red one has the strongest acidity. The two Blue liquids are both basic. The green liquid is the neutral liquid.

Discussion: 
During the experiment, we attempted to balance the colours in the Ph levels. The strongly acidic liquids are red and the strongly basic liquids are of a dark Blue colour. The universal indicator shows which level of the Ph scale it is. While doing this experiment, we quickly figured out that balancing these solutions is quite difficult. You have to mix the right amount of Acid and Base to balance the solution, then you add the universal indicator to see what level it is on the Ph scale. It is difficult to balance it perfectly as it can switch from one colour to another with a single drop of acid or base.

Conclusion:
In conclusion, our experiment was successful as everyone in our group somehow managed to neutralise the solution. We actually had a little race with Jessica as the winner. After that, Mr Heath challenged us to create a rainbow with the solutions.

Friday, 31 May 2019

Making da salts


For our last experiment for the Acids and Bases, we are going to be making salts.

Aim: 
To produce copper sulfate salt by reacting copper oxide with an acid.

Equipment:

  •  Copper oxide powder
  •  Dilute sulfuric acid
  • 50ml measuring cylinder 
  • 2 100mL beakers 
  • Bunsen burner
  • Tripod
  • Gauze mat 
  • Funnel
  • Filter paper
  • Thermometer
  • Spatula 
  • Evaporating Basin
  • Stirring rod
Method:
1. Add 20mL of Sulfuric acid to a 100mL beaker. Heat the acid until it reaches 70degrees celsius. Turn off your bunsen burner. 

2. Once heated, use a spatula to add a pea-sized portion of copper oxide to the beaker. Stir the mixture for 30seconds. 

3. Repeat step 2 until no more will dissolve. Allow beaker to cool.

4. Fold the filter paper and place it into the funnel. Place the filter funnel into the second beaker. 

5. Make sure the beaker is cool enough to hold at the top. The contents should still be hot. 

6. Gently swirl the contents of the beaker to mix and then pour into the filter paper in the funnel. Allow filtering through. 

7. Rinse the beaker you used to heat the mixture previously, and place it back to the top of the tripod filled with 50-60mLs of water. 

8. Place the evaporating basin on top of the beaker and carefully pour some of the solutions from the beaker into the evaporating basin. 

9. Gently heat the beaker until the solution in the evaporating basin has reduced by half.

10. Leave the evaporating basin to cool, once cool, move the evaporating basin to a warm place where it will not be disturbed, and observe over the next few days. Blue copper Sulfate crystals should form. 

Results:
We were able to create the kinda create the salt we desired.  Our experiment was destroyed by another classes student, this is the results of their experiment. 

However, on Monday this should be redone with the experiment that is being recreated. 

Discussion:

During the experiment, we were able to recreate the original. The acid in the sulfuric acid was combined with the copper oxide powder and triggered a chemical reaction which created the copper sulfate salt. While in the earlier parts in the experiment, if you did it yourself, you would have noticed that it was a complete liquid until when you next checked up on it after some time. By when you looked at it, it would have crystalized. This is simply because after evaporating the water molecules only the copper sulfate salt was left.

Conclusion:

We don't currently have a conclusion of whether the experiment worked or not. However, we can report that we followed all the instructions to a tee. This post and my other classmates will be later on updated with the results of the experiments. 

Thursday, 21 February 2019

All you need to know about your Heart! ❤ (Not this kind)


Image result for heart attacksWhat is a Heart Attack?
Heart Attacks are caused by blocked blood flow to part of the Heart, which results in damage to the Heart muscle. The blockage is most often build up of fat, cholesterol and other substances, which forms a plaque in the arteries that feed on the heart. Heart Attacks can be fatal.

Symptoms
Common Heart Attack Symptoms include pressure, tightness, pain, or a squeezing, or aching sensation in your chest or arms, that can spread throughout your body.  Nausea, indigestion, heartburn or abdominal pain are also common symptoms of a Heart Attack. But shortness of breath, cold sweat, fatigue, lightheadedness or sudden dizziness are also symptoms common in patients that have experienced Heart Attacks.
Related image

How to Prevent Heart Attacks
There are numerous ways to avoid a Heart Attack, here are three!

Control your blood pressure - High blood pressure is a major risk for Heart disease. As an adult, it's important that you get your blood pressure checked regularly, so you know if it's too high or too low.

Image result for heartStay generally healthy - This sounds pretty obvious, but staying healthy in general is quite an important factor! Being healthy can lower the risks of Heart Attacks. Not only eating healthily and maintaining a healthy lifestyle but keeping cholesterol levels balanced and avoiding too much alcohol and smoking. Staying at a healthy weight and managing stress can also lower the risk of Heart Attacks.

Get regular exercise- Excercise has many benefits, it can ensure that you maintain a healthy weight, and also stay healthy in general, regular exercise can make sure you stay healthy!

                                                       Treatment for a Heart Attack

There are many treatments for Heart Attacks. But when someone is experiencing a Heart Attack, CPR should start immediately, manual compressions are best if a defibrillator is unavailable. After someone has had a Heart Attack, it is common for repercussions to occur. Common repercussions include Heart failure, weaker Heart and many more. 

Saturday, 16 February 2019

Phillip and his Phalanges! 👏


For Science, our class has been learning about Medical Science. One of the tasks we had was to draw a skeleton with all of the bones and muscles. My group was Jessica, Molly and me! Our group is pretty creative so Molly decided to draw a sombrero and snake on our Skeleton Phillip. Our group actually won the creativity section of the competition our class had. We accidentally forgot to label some of the bones, but we managed to do our best! Enjoy this smexy photo of Phillip. Photo credit to Molly!!!


Monday, 11 February 2019

Arthritis: It hurts, like... really hurts


What is Arthritis?
The term "Arthritis" in literal definition means inflammation of the joints but is more commonly used to describe any condition regarding severe pain in the joints. Arthritis is a condition that affects your joints. There are more than 100 different types of arthritis and closely related conditions that anyone of any age can suffer from, and can involve almost any part of the body; knees, hips, spine, and other joints that bear heavy weight. This can also include smaller joints such as fingers and toes.  This condition occurs when your joints become damaged or worn out. The actual cause of Arthritis will be explained further later in this post as well as the different types of Arthritis. 

The joints in your body...
Almost every day, you move your arms up and down, exactly how is this possible? Most people don't give it much thought, however, moving your arms or legs in this manner would not be possible without specialized structures called joints. The most common joints are freely movable joints in the body called Synovial joints. Synovial joints are the most movable part of the body. In the human anatomy, a joint is a physical connection between two bones. For example, the knee joint is the point of connection between the femur, or thigh bone. There are six types of synovial joints, without these joints, your body could not move like it does today. 

The Pivot Joint
Related image
The Pivot joint is also known as the rotary joint and allows for rotational movement. This type of joint can be found between your neck vertebrae. When you turn your head side to side, its due to the rotary movement allowed in the Pivot joints. 


The Hinge Joint
Image result for the hinge jointThese joints can be found between your upper and lower arm bones, aka your elbow, as well as your ankles, fingers, toes and feet. Hinge joints operate like hinges on a door. They allow for a swinging motion, where bones can either flex towards each other or extend apart. If you twist or overextend these joints, it can result in injury. 


The Saddle Joint
Image result for the saddle jointSaddle joint is similar to the Hinge joint, but provide more range of motion. In the Saddle joint, the bone sitting on the saddle can move in an oval shape relative to the other bone. Our thumb is a classic example of a Saddle joint, thumbs can move using a hinge-like motion but can also rock from side to side. This is because of the Saddle joint. It's the Saddle joint that makes our thumbs opposable. Human thumbs are called opposable thumbs because they can be moved around to touch the other fingers, which gives people the ability to grasp onto things. 


The Plane Joint
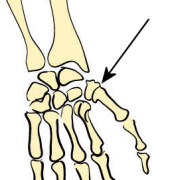
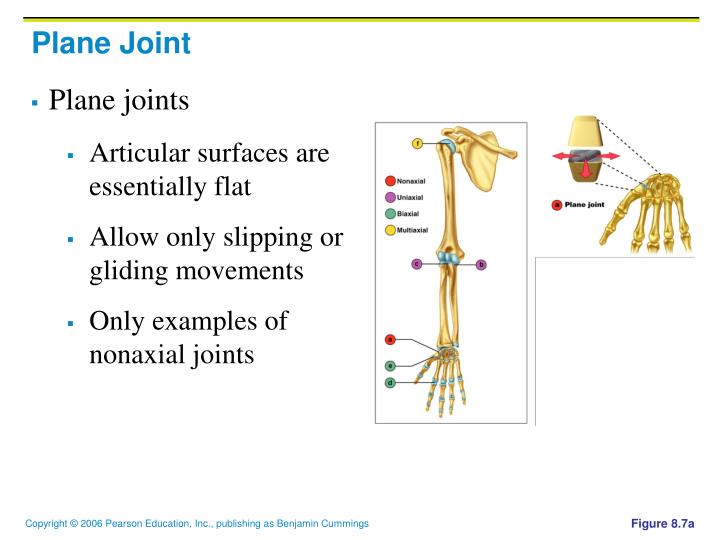
Image result for the plane jointPlane joints, sometimes called gliding joints, are probably the most difficult joint type to visualize. They are usually associated with the small bones of your wrists and ankles. In this type of joint, bones slide along beside one another. This allows for movement in many directions, hence the flexibility of the wrists. These bones also are in your spine and ankles.  


The Condycloid Joint
Image result for the condyloid jointNext, we have the Condocloid joint. These joints form where the head of one or more bones fits in a cavity of another. You'll find this type of connection in your wrists where it connects to the radius, or lower arm, and carpel, or wrist bones. These are characterized by one bone having an outwardly curved end while the other end is inwardly curved. The shape allows us to move the joint in two different ways, side to side, and up and down. 


The Ball and Socket Joint
Image result for the ball and socket jointThis type of joint allows for a wide range of rotation and movement. Your hip and shoulder joints are the only Ball and Socket joints in the body, due to the need for great motion at the end of the bodies limbs and the vast amount of muscles needed to move and support such flexible joints. Two main compartments make up a Ball and Socket joint: a bone with a spherical head and a bone with a cup-like socket. In the shoulder joint, the spherical head of the humerus bone fits into the cavity of the scapula. The hip joint is somewhat less mobile than the shoulder but is an overall stronger and more stable joint. The added stability of the hip joint is necessary to bear the weight of the body resting on the legs while performing actions such as walking or standing. 


The Anatomy of a joint 
The joints are where the ends of two of your bones meet. The Cartilage is a type of tissue that covers the surface of a bone at the joint. Cartilage helps reduce the friction of the two bones, reducing the risk of wearing of the bones. The Synovial Membrane lines the joints and seals it into a joint capsule. Not only does it do that, but the Synovial Membrane also creates a clear, sticky fluid called Synovial Fluid. The job of the Synovial Fluid is to lubricate the cartilage. Strong Ligaments surround the joint to give support and hold everything together. 


The different types of Arthritis
As there are hundreds of different types of Arthritis, I will only include three in my list... 

Osteoarthritis
Image result for osteoarthritisSometimes called degenerative joint disease or degenerative arthritis, Osteoarthritis is the most common chronic condition of the joints. Osteoarthritis can affect any joint, but it occurs most commonly in knees, hips, lower back and neck, small joints of the fingers, and bases of thumbs and big toe. In normal joints, cartilage provides a smooth, gliding surface for joint motion and acts as a cushion between the bones. In cases of Osteoarthritis, the cartilage breaks down, causing pain, swelling and problems moving the joint. As Osteoarthritis worsens over time, bones may break down and develop growths called spurs. Bits of bone or cartilage may chip off and float around in the joint. In the body, an inflammatory process occurs and proteins and enzymes develop that further damage the cartilage. In the final stages of Osteoarthritis, the cartilage wears away completely and the bones rub against each other leading to joint damage and more pain for the patient. There are many reasons why someone might develop Osteoarthritis, such as excessive exercise, very little exercise, being overweight, or commonly, aging. Symptoms of Osteoarthritis include swelling around the joint, stiffness of the joint, weakness in the muscles, and painful cracking of joints. There are many different forms of treatment for Osteoarthritis, but most include some sort of painkilling pills. 


Gout Arthritis 
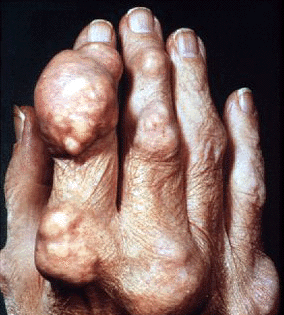
Image result for gout arthritisGout is a form of inflammatory arthritis that develops in some people who have high levels of Uric acid in their blood. Uric acid comes from a protein called Purines that come from food. Usually Uric acid just passes through your body, but in certain circumstances, such as being overweight, the uric acid builds up. The acid can form needle-like crystals in a joint and cause sudden, severe episodes of pain, tenderness, redness, warmth and swelling. These crystals damage the cartilage. There are many stages of Gout. Asymptomatic hyperuricemia is the time prior to the first Gout attack. There are no symptoms, but uric acid levels are high and crystals are forming in the joint. Acute Gout, or a Gout attack, happens when something causes uric acids to spike or moves crystals that have formed in a joint, triggering the attack. The resulting inflammation and pain usually strikes at night and intensifies later. The symptoms ease after a few days and likely go away after 10 days. Interval Gout is the time between attacks. Although there's no pain, the Gout isn't fully gone. Low-level inflammation may be damaging joints. Chronic Gout develops in people with Gout whose uric acid levels remain high over a number of years. Attacks become more frequent and the pain may not go away as it used to. Joint damage is a common thing, which can lead to a loss of mobility. This stage is commonly preventable. 


Rheumatoid Arthritis
Image result for rheumatoid arthritisRheumatoid arthritis is an autoimmune disease that causes inflammation, pain, and swelling in the joints. It can occur at any age but most often develops between the age of 25 and 50, and affects women more commonly than men. Rheumatoid Arthritis typically starts in the small joints of the hands and feet but it can also affect other parts of the body as well as causing fatigue. The normal role of your body's immune system is to fight off infections. In an autoimmune disease, your immune system attacks healthy tissue instead, causing inflammation. In Rheumatoid Arthritis, the immune system attacks the synovium, a thin membrane that lines the joints and makes a fluid that helps them move smoothly. Inflammation thickens the synovium, resulting in swelling, and pain in and around the joints. Rheumatoid symptoms include swelling, stiffness, joints feeling hot and painful, fever, fatigue, weight loss, and decreased appetite. Rheumatoid Arthritis usually starts slowly and affects joints symmetrically. For some people, it develops very quickly.


Common Myths about Arthritis

1. Arthritis can't be prevented 
False, while it's true that you can't completely prevent arthritis, but there are ways that you can reduce the risk of getting it. You cannot do anything about some risk factors, such as being female. However, maintaining a healthy weight, staying physically healthy, not smoking, avoiding strain on muscles does somewhat decrease other risk factors. 

2. All Arthritis is the same
False, as mentioned many times in this post, there are more than 100 different types of arthritis, ranging from Osteoarthritis to Gout, there are many different types.

3. Popping your knuckles gives you Arthritis
False, this is one of the biggest myths. The reason you knuckles pop is because when you pull your bones, by stretching or cracking them, bubbles in the synovial fluid pop. This by no means increases the risk of getting arthritis. But can damage your hands in different ways. 

4. Only old people get Arthritis
False, as I have stated multiple times, arthritis can happen to anyone. 

5. Arthritis consists of minor aches and pains
False, If you read this post thoroughly, you would understand that arthritis is a very painful disease that many people around the world have to live with.